

Procedural Modelling Tools - Cave Deformer
- Jul 19, 2018
- 4 min read
Overview

There are materued terraforming solution in modern commercial engines. Also 3A studios have their own ways like DUNIA 2 (used in Far Cry 5) uses Houdini Engine for their vast wildness building. But when it comes to caves, modellers are still labored by heavy hand sculpting. Or the load moves to environment artists where they need to place rocks around. This tool will never be a silver bullet for such pain but it do provides a possible solution under certain conditions when art team want natural look caves with water erodes. The tool takes in simple geometry and reconstruct it based on VDB operations.
Technical Details
1.Input Operations

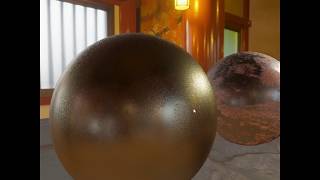
The input of the tool can be any geometry with closed geometry. Here I placed a bunch of spheres and tubes, combine them and use them as input geometry. The tool will convert them into VDB and then remesh it back to get a clean geo.
2. Macro Noise

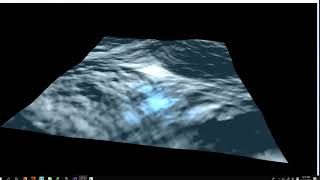
Next step is to add Macro Noises to simulate the erotion of water to get the overall shape of the cave correct. The idea is to stack two noise together and use a graph to control the mount of noise.
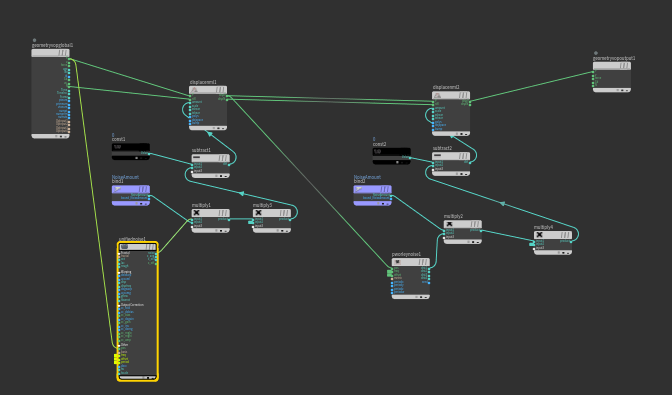
What these bunch of node does is for each points, take in the point position and it's normal, calculate the noise based on the point position and add the noise amount to the point along its normal. Here I use the combination of Worley F2-F1 Noise and Periodic Worley Noise. With the noise frequency higher in the Y axis, the water erotion effect can be achieved.

3. Speleothems
The wiki for speleothems: https://en.wikipedia.org/wiki/Speleothem There are many types of speleothems and in this particular tool I will be focusing on stalactite (https://en.wikipedia.org/wiki/Stalactite ). On the right side is a gif that I found on wikipedia demonstrating the formation of stalactites. Water drops containing mineral substances consolidate themselves while dripping down to for stalactites. So in order to give my cave a more natural looking, the corresponding spatial relationship of upper part of the stalactite and lower stalactite shall be retained. The plan is to detect all primitives facing downward, group out border primitives and scatter points on them. Those points are again ray casted upward to find their corresponding upward points. After that, stalactite models are duplicated on those points are fused back to original model.

So I group out all faces with their normals point downward, use a for loop to delete boundary primitives, and scatter points on them. Then I use a ray node to cast points upward. One trick is to extrude the ray collision geometry a bit so all points can have a solid projection. And finally do a random scatter on the rest part of cave ceiling.

The next step is to copy speleothem models into points and convert them into VDB. Then one pass of Worley Noise is added to all copied models to make it look more rock like. Of course artists can choose to input their own model instead of Worley noised one. You might notice some of those ceiling speleothems and bottom speleothems merged together and formed pillars, which is how it should be in nature.

The mesh after VDB combine needs cleaning and face reduction. I want to preserve details on speleothem shapes. I did another ray cast back to the geo and color out the sharp part of speleothems. I then turned them into point attributes and use the this attribute in PolyReduce node (Magic in Houdini 16.5) to maintain shape in poly reduction.

The the cave shape is almost done. One extra pass of floating pieces delete was added using attribut wrangle node. The largest piece of the whole object was founded with its bounding box calculated as reference, then loop through all other small pieces to delete them. When working with VDB they always give you small pieces of geometry after you convert them back to mesh.
4. ...UV!!!
I would say this is the hardest part of the tool. No artists will want to manually create UV for such complex piece of geo so as a more "Techy" artist I have to give at least ok result for production. There are existing game shelf tools developed by SideFX to deal with UV and their tools are great. But I need something more unique to my workflow.
One downside of converting geos into VDB and convert them back is that you lost all informations on UV( as well as Normal and other things but they can be easily fixed). To begin with, I need to tell the software where to cut UV. I want to seperate all speleothem shapes and UV them seperately.


After cut out Cave shapes into several pieces, I calculate the Concavity of the shape and seperate certain pieces with green color higher than certain value. Then I run a pass of UV Unwrap for each seperate speleothem piece and another pass on the remaining smooth geo. Finally one pass of UV flatten to make sure the proportionof each UV island is correct. Following is the resulting UV for one piece of cave mesh.


And all UVs for each big piece are stacked on top of each other for tilable textures.
5. Review
The shortest path method from SideFX also gives promissing result. I just want to appreciate it here. The idea is to turn the mesh into super low poly and map the points of low poly model back to original mesh. Then another pass of shortest path finding was ran based on those points. There paths are then used as UV seams. It might be a concidence but most of the time, the shortest path between two geometry salient point are usually where people cuts them seam. So I build another version of the tool without VDB fusing. Following is the UV and with out VDB conversion, I just scatter speleothem models on the cave model which preserves the UV

Comments