

Procedural High to Low Poly Workflow using VDB in Houdini
- Sep 20, 2018
- 4 min read


High poly mesh in Houdini

Low poly mesh generated from the high poly

UV map generated in Houdini

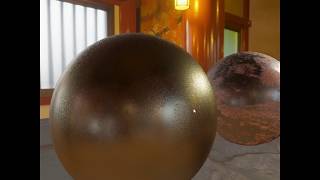
Height Map, Normal Map and Ambient Occlusion Map baked out from Houdini

In game screenshot ( UE4 )

Reference image online (https://www.textures.com/download/concretebunkerdamaged0042/26059)
I have been dreaming of working on AAA warfare titles like Battlefield or Call of Duty. And such eager drives me to spend time working on things that might potentially improve current art pipeline for them. Inspired by watching videos, tech demos and GDC talks, I came up with a way that could potentially accelerate environment pipeline (i.e. concrete, woods, walls) by procedural generating noise patterns and use them to deform shapes. And thanks to the power VDB tools in Houdini, such approach became possible in recent years. So here I made a tech demo demonstrating how I would do it.
1.Initial Geometry

Initial concrete barrier to start with
The initial shape is created using simple bevel and extrusion in Houdini. I manually scripted the offset to make it always snap to the ground plane. First thing first, I want to dig those salient beat up shapes on my geometry. but it is still too early to use any noise function because it is over-killing and don't give the best result. So I turned into old tricks - scatter points around geometry (except the bottom part) and copy shapes to it and then do a bevel.

Popcorn shape rocks that will dig into the geometry later
The popcorn shape geometry are just a polygon sphere with a mountain node following it. The reason why I'm using this popcorn shape is that it simulates the damage from explosions best. Of course for future production reasons we could use more interesting shapes but for this demo popcorn shape is good enough.

Concrete shaped with popcorn rocks
With these holes on our geometry, we got the macro feature of the geometry settled. But still we want to add some micro details, some unnoticeable bumps on the geometry to make it more believable. There are several ways to do that but I picked the easiest this time. Again I randomly scattered some points on the surface but this time with each points carrying a different bump information ( in this demo it is the red color) and use that to group out faces and run a noise pass on it.

Perlin Noise applied to the red part using Mountain nodes
Now the geometry is properly shaped and can be passed into VDB operations.
2. VDB operations
Inspired by this wonderful talk ( Procedural Rock Formations for UE4 | Saber Jlassi | Houdini HIVE at SIGGRAPH 2017 https://vimeo.com/228238370 ), when playing with noise we will eventually meet the bottle throat where polygon mesh can't afford that much detail we need for tiny little noises. And when this happens we will need to swith into another type of data structure. Luckily that data structure - volume and VDB are supported by Houdini with a bunch of handy tools.

Ghosted geometry because they are converted into fog VDB
A little trick I myself use a lot after to convert anything into VDB is to do a volume ramp with to ramp value set to constant value one. By doing that you can get a nice uniform density among your fog VDB and acts as a good foundation for following works.
Time to add the final detail noise to the geometry. I'm a guy loving codes over nodes but when it comes Volume, nodes works better. Following is the inside of volume VOP node and I will explain how it works.

Volume VOP for detail noise
Simple but powerful. Here I use the position of each voxel to drive the noise. And stack two types of noise which are Anti-Aliasing noise and Worly F2-F1 noise and use them to change the density information stored for each voxel. To me, Worly noise is perfect for simulating macro deformation in nature and Anti-Aliasing noise is good at making those details. One thing to keep in mind using noise in volume is that the noise will be applied to the interior of your geometry so you will want to clean them before you throw the mesh into the engine. The way I do it is not the most efficient but it works like a charm. First, you shrink down the original geometry to 95%, turn it into VDB and uniform it using Volume ramp. Then use a VDB combine node with mode setted to Add, and then you do a volume ramp again. That will uniform the density of the interior of the volume so there won't be any small floating islands after you turn your VDB back to mesh. Apart from that, I also ran a pass of island deleting script after that to make sure only one piece of geometry is passed down into engine. The script is my working code at NetEase so I can't elaborate too much in here.

fog VDB with noise applied to it


Geometry cleaned up using the script

High poly mesh after convert VDB node
3. UV on low poly
After I ran a pass of UV Unwrap and UV Layout, the algorithm gave fairly good result. But still I don't want small islands on my UV. There are Sops made by SideFX but it would be nice to have the ability to manually pick which island to sew back in low poly mesh.

Nodes to manually pick edges to sew back
Here I'm using a vertex split node to cut my geometry using edges of the UV island. Then I group them out and transfer the group information back to my low poly mesh. After that I provide that group information to the UV flatten node. With that information I can click on a certain island and that island automatically sewed back to it's corresponding main island. (based on tutorial: https://vimeo.com/257188140 )
4. Conclusions
Houdini is really powerful at generating procedural patterns like wood, rock and sand. And with the procedural nature it, one can quickly generate a considerable number of assets quickly. One thing I learnt from this tech demo is that, there are certain condition when doping something manually yield better result compared to pass it to software. Like UV and the starting low poly model.
Comments